- Launch Script Editor.
- Type mount volume "smb://server name/share name" for each share you want to automount. For example, mount volume "smb://mediaserver/Movies"
- Test.
- Save the code as an AppleScript.
- Save the code as an application.
- Add the application to your System Accounts Login Items.
How To: Map a Network Share and Automount
Happy Anniversary!

Happy 5th Anniversary! As in 5 posts? OK... lame. Well, hopefully this post isn't perceived as equally lame. Here goes...
See the last three posts? Did you know that if you put them together they tend to solve nearly 90% of all problems involving your Mac and OS X? It's true. SMC Reset, Safe Boot Mode, PRAM Reset. Remember that, in that particular order.
How To: PRAM Reset

A quick PRAM Reset, or Parameter Reset, is an easy way to resolve issues involving various that include but may not be limited to:
- Speaker volume
- Screen resolution
- Startup disk selection
Here's the steps you need to take:
- Shut down the computer.
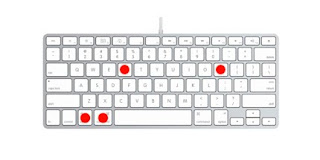
- Locate the following keys on the keyboard: Command, Option, P, and R. You will need to hold these keys down simultaneously in step 4.
- Turn on the computer.
- Press and hold the Command-Option-P-R keys. You must press this key combination before the gray screen appears.
- Hold the keys down until the computer restarts and you hear the startup sound for the second time.
- Release the keys.
Additional Information for Third-party displays
Per Apple Support, if you have screen resolution issues with a third-party display (monitor) and resetting the NVRAM/PRAM does not help, try using the display's built-in menu system if it has one. For details, see the manual that came with your monitor. There may be buttons on the front of the display to configure the internal settings and screen geometry. The display may include an "automatic" adjustment mode too.
Tip: If you use a DVI connection and you must click "Detect Displays" (in Display preferences) several times for your third-party display to be recognized, try using the monitor's built in menus to set the DVI connector to a digital signal.
How To: Safe Boot Mode

Once in a while, it becomes necessary to start up in Safe Boot Mode. It is good practice to do so ever 2 -4 months, strictly from a maintenance perspective, as it will reorg and repair, helping to keep OS X humming along as it should. Generally speaking, however, Safe Boot Mode does several things:
- It forces a directory check of the startup volume.
- It loads only required kernel extensions (some of the items in /System/Library/Extensions).
- It disables all fonts other than those in /System/Library/Fonts.
- It moves to the Trash all font caches normally stored in /Library/Caches/com.apple.ATS/(uid)/ , where (uid) is a user ID number such as 501.
- It disables all startup items and login items.
- It deletes the dynamic loader shared cache at (/var/db/dyld/). A cache with issues may cause a blue screen on startup, particularly after a Software Update. Restarting normally recreates this cache.
Taken together, these changes can help resolve software or directory issues that may exist on the startup volume.
Here's what you do:
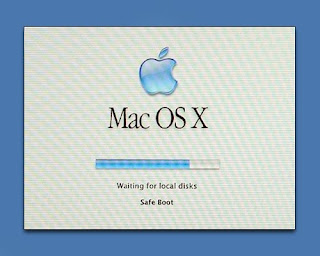
While holding down the SHIFT key, power on your Mac. KEEP THE SHIFT KEY DEPRESSED! Hold the SHIFT key until the spinning gear appears beneath the Apple logo on the startup screen.
That's it!
How To: SMC Reset

OK... I'm off to a slow start. I intended to start this much sooner and here we are on version 10.6.2 already. Here's a tip I needed to use myself this past week and I think it's a great task to perform when you have encountered a problem that causes unusual and/or erratic system behavior. Sometimes, resetting the SMC is the only way to resolve what's ailing your Mac. There are a few different ways to accomplish this basic task and it very much depends on the type of Mac you're using.
For MacBooks with removable batteries:
- Shut down the computer.
- Disconnect the MagSafe power adapter from the computer, if it's connected.
- Remove the battery.
- Press and hold the power button for 5 seconds.
- Release the power button.
- Reconnect the battery and MagSafe power adapter.
- Press the power button to turn on the computer.
- Shut down the computer.
- Plug in the MagSafe power adapter to a power source, connecting it to the Mac if its not already connected.
- On the built-in keyboard, press the (left side) Shift-Control-Option keys and the power button at the same time.
- Hold for 3 seconds and release all the keys and the power button at the same time.
- Press the power button to turn on the computer.
- Shut down the computer.
- Unplug the computer's power cord.
- Press and hold the power button for 5 seconds.
- Release the power button.
- Attach the computers power cable.
- Press the power button to turn on the computer.
